Monster Hunter Stories 3 Layered Armor & Capcom ID Guide: Fixing Your Fashion
Nobody respects a monster rider who looks like they got dressed in the dark during a localized earthquake.
The classic Monster Hunter experience has always involved a phase where your character looks absolutely horrific. You are forced to mix a bright pink Rathian helmet with bulky bone armor just to get the exact stats you need to survive. Min maxing your build usually means sacrificing your dignity. Thankfully, you do not have to suffer through the clown suit phase in this game.
Capcom actually gives you access to a full transmog system incredibly early in the campaign. You can edit your physical appearance, swap your cosmetic armor, and even dress up your companions. I am going to walk you through exactly where to find these menus and how to navigate the frustrating corporate account linking process required to unlock Rudy's exclusive outfit.
Total Character Overhauls at the Base Chest
If you regret the horrific neon hairstyle you picked during the opening cutscene, do not restart your save file. You can fix it almost immediately.
The moment you gain control of your character and reach the Ranger Base at Azuria, you have full access to the customization suite. You just need to walk up to the large chest in your room and interact with it. Selecting the Change Appearance option throws you straight back into the character creator.
I actually have to praise the developers here. In older mainline titles, Capcom used to aggressively monetize this feature by charging real money for Character Edit Vouchers (Excuse me, I had to quickly puke after writing that). In Monster Hunter Stories 3, it is completely free and unrestricted. You can change every single aspect of your rider, including their gender, at any time. The game even saves your customized appearance presets separately for both male and female body types. You can swap back and forth without losing the hours you spent tweaking your jawline.
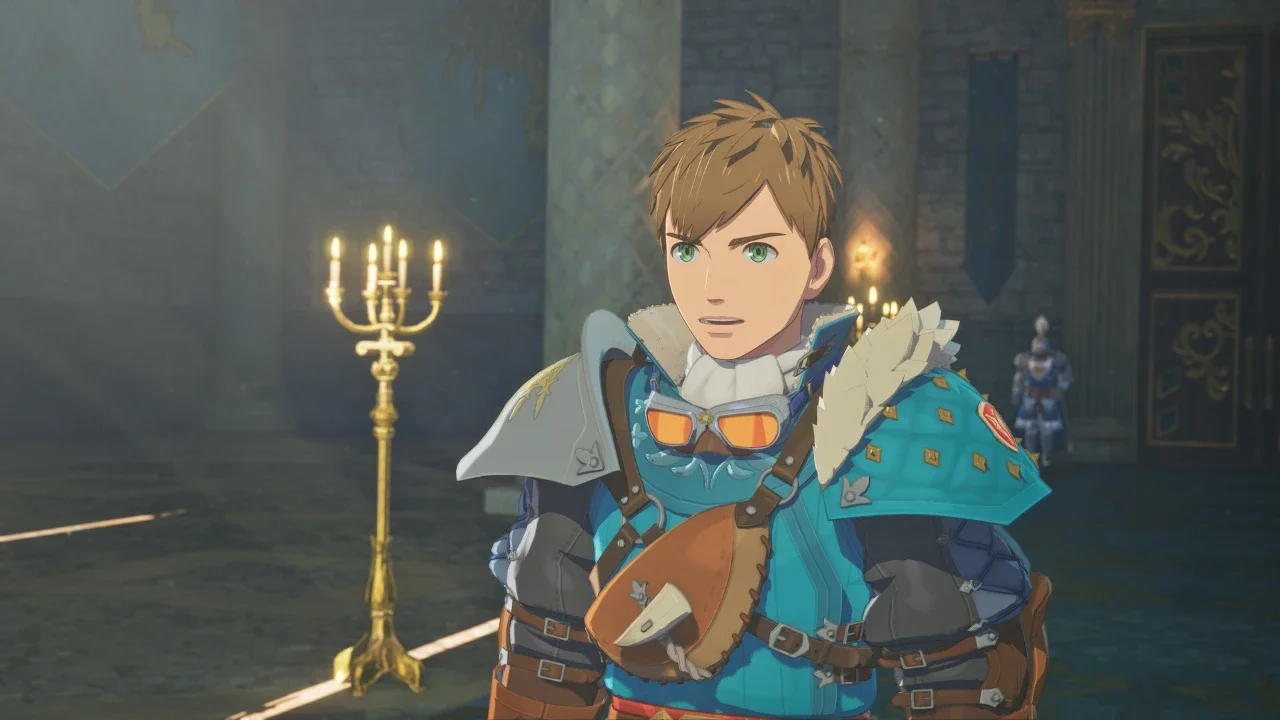
Layered Armor: The True Endgame
Your physical face does not matter much when it is covered by a giant metal dragon skull. That is where Layered Armor comes in.
Using the exact same chest at the Ranger Base, you want to select the Change Clothes option. This is your dedicated transmog menu. Layered Armor overrides the visual appearance of whatever hideous gear you actually have equipped, allowing you to maintain your carefully calculated defensive stats while looking incredibly sharp.
This means you can freely equip the best defensive gear and slot in all your crucial survival decorations without worrying about the visual clash. If you are still ignoring those decoration slots, you need to read my MHS3 tips for beginners before a late game boss flattens you. The Change Clothes menu is also where you customize your party members. You can adjust the armor worn by your companions so your entire squad looks cohesive before you head out into the wilderness.
All of these visual changes are purely cosmetic. It will not break your builds, and it will not cost you any zenny. You can gather materials and run expeditions looking exactly how you want. If you are low on specific crafting materials to build the base armor you are trying to cover up, reference my MHS3 combination recipes list to track down the right ingredients.
Navigating the Capcom ID Nightmare
While the base layered armor system is fantastic, getting the promotional DLC outfits is a slightly different story. Publishers love harvesting player data, and Capcom is no exception.
If you want the exclusive Catcom Works Outfit for your companion Rudy, you have to link a registered CAPCOM ID to your game. It is a tedious, multi step process that requires jumping between your console or PC and a web browser. A lot of players are getting stuck in a loop trying to figure out why the outfit is not showing up in their chest.
Looking Good While Grinding
Once you have your layered armor sorted and Rudy dressed in his corporate sponsored gear, you are finally ready to actually play the game without cringing during cutscenes.
Fashion hunting is great, but you still need a competent team of monsters to back you up. If you look amazing but keep getting stuck behind shallow rivers because you brought the wrong squad, check out my master list of all MHS3 riding actions.
If you want to show off your new outfits in different biomes, make sure your fast travel network is fully operational by clearing out the dangerous local wildlife. My guide to fast travel and Feral Monsters will help you establish those critical forward camps. Once those camps are clear, you can spend the rest of your playthrough looking incredibly stylish while you manipulate the local ecosystem using my MHS3 egg farming and habitat guide.